dil·i·gence:careful and persistent work or effort

Proverbs 13: 4 The soul of the sluggard craves and gets nothing, while the soul of the diligent is richly supplied.


Wednesday, December 28, 2011

A very Pinterest Christmas

Well, this was certainly a very Pinterest Christmas for this girl!  I got so many ideas from Pinterest on how I wanted my house decorated, tasty snacks to try, and even on several gifts that eventually ended up under the tree.  If you are not familiar with Pinterest, you have a very serious choice to make right here and now.  You can:
  1. Continue reading to find out what Pinterest is all about.  This is a risky choice because you will inevitably fall in love with the virtual bulletin board and proceed to waste away hours browsing and pinning all kinds of project ideas and dream inspiration.
  2. Stop reading now and continue with life as you know it.
In short, Pinterest is a fun way to organize ideas and blissfully waste hours browsing the interwebs.  Users can set up virtual bulletin board onto which they can "pin" photos (with the link automatically embedded) of design ideas, crafty things, recipes, basically anything!  Then, they can visit their virtual bulletin boards any time they want for inspiration or tutorials, etc.  Seriously, if you haven't tried it, shoot me an email.  I'll be glad to send you an invitation (oh, yeah, that is one drawback - you need an invite from a user).  You also have to be on Facebook.  I don't know the details, but the two seem to be connected somehow.

But, enough of that- back to a very Pinterest Christmas!  I created several gifts based on ideas from Pinterest, but of course, I have been unable to share any deets on the gifts, because I have been afraid their recipients would read!

The first thing I made was a pennant flag for each of my nieces and nephew.  Yeah, yeah, you're probably tired of reading about me and my pennant flags, but too bad.  I'm not through with them yet.  :)

This is sweet Leah's flag.  Her color is pink, so I used some pink fabric and coordinating yellow paisleys so it wouldn't be pink overload.  I got this and all of the fabric I used in fat quarters.  I won't get into what a fat quarter is, but basically it's a square shaped quarter yard of fabric- perfect for small projects like this.  It comes already cut that way, so I didn't have to take 2 bolts of fabric times 5 kids up to be cut.

After I cut the triangles and sewed them to the quilt bias, I stenciled the kids' names with simple craft paint.


 After stenciling, I sewed a small amount of ribbon onto each one for hanging.


And, here they all are, ready for their new home!  I think my sister plans to hang them on the wall above each kids' headboard.  How cute is that?!

My next Pinterest project was this date art (originally found here).  Basically, you just use important dates to make art.  I made this for my sister and brother-in-law.  We have each of their birth dates, their wedding date in red, and then each of the kids' birthdays.  Once I compiled the dates (the hardest part of the project), all I did was select a font and print it out on a piece of $.49 - 50% craft paper from Hobby Lobby.  Then, I popped it in a frame and called it done.

I love the simplicity and the uniqueness and meaning behind this art.

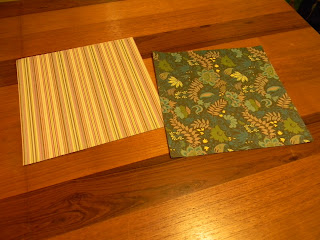
And, the final Pinterest Christmas project was some more beverage coasters from tiles!  I have already described how I made these here, so I won't go into details.  My sister's family is very musical, so I chose paper to use that looks like sheet music.  A little mod podge, and my plain tiles turned into beverage coasters!


xo,

Emily

Tuesday, December 27, 2011

On the third day of Christmas my true love gave to me....

...a table refinishing project!


I have had this 45" round pedestal table since January of this year when I picked it up at Goodwill for $25.  Yes, fellow thrifters, you read that correctly:  I got an antique pedestal table for only $25.  An awesome, antique table in structurally wonderful condition!

It was an amazing buy.  But, it was also in terrible need of a refinishing job.  It looks as though several small animals have sharpened their claws on it, and someone with good intentions and awful refinishing skills has also had his way with it.  And, then there was the time when a hot pot was placed on top of a wet towel, and this happened:


Whoopsie!  But, have no fear!  Super table refinisher Emily, The Diligent One, to the rescue!

Ahem, except I have never refinished a thing in my life.  But, I figure this is as good a project as any to start on, wouldn't you agree?  So, I borrowed the belt sander and the palm sander from my dad, and my goal this week is to get this thing sanded.  And, if it doesn't work out, I figure I can always paint it!  Haha!

Stay tuned for progress...

xo,

Emily

Monday, December 26, 2011

Merry 2nd day of Christmas!

Did you know that the 12 days of Christmas actually begin with Christmas day and extend 12 days from there until January 5th?!  I didn't actually know that until recently, so this year, we will be celebrating Christmas and the birth of Christ for the next couple weeks unabashedly!

Today started with celebrating via sleeping until nearly 11am (with a potty break for the dogs, of course).  Currently, we have continued the celebrating at our local coffee shop where Colin and I are enjoying a cup of joe and some lunch - each with our laptops, of course.  (Hey, sometimes you have to be creative about how to spend mutually enjoyable time with your teenager!  I promise we're taking a break from staring at our screens here and there to actually interact with each other.)  I am just so happy to be in his company.  :)

So, yeah, there you have it.  A completely pointless, rambling blog entry!  Haha!

And because no entry is complete without a picture...

xo,

Emily

Saturday, December 24, 2011

Merry Christmas Eve


As I sit here at home alone tonight, it would be very easy for me to feel sorry for myself.  My parents spent the day with me, and we had a lovely day, but they've gone off to my sister's.  And, as is the case every year, Colin is with his dad.  They do a lot of celebrating on Christmas Eve and the day before, so it's tradition for Colin to spend this evening with his father's side of the family.

So, that leaves me.  Home alone.  Well, as alone as you can be with 3 dogs.  :)

But, I have good news.  I'm not sad.  Not one bit.  As I sit on the couch, I am overwhelmed with gratitude.  My cup truly runneth over.  I look around, and I see loveliness surrounding me.  I see signs of a well loved home everywhere I look.  I see school books and papers cluttering Colin's desk.  I see a fire burning hot in our pellet stove.  I see the glow of the Christmas lights that Colin and I carefully strung around our tree.  And, these things do please me.  But, those aren't really what is most pleasing to me tonight.  As I experience this quiet moment here safe in my warm home, I am so thankful.  I am thankful for health and stability.  I am thankful for family and friends.  But, mostly, I am thankful for the reason for this whole Christmas season. 

I am thankful that it was God's design, his will, to send us his Son.  I am thankful that He loved us enough to send his Son to us as a humble baby.  To live here among men, and to eventually die on a cross.  All for us.  All for you.  And for me.  So, as I sit here alone tonight, my heart is truly thankful.  I am not for one moment focusing on what I do not have.  How can I when I have been given so much?

xo,

Emily

More Christmas-ification

Over the past several weeks, our Christmas decorations have spread from the living room to the rest of the house.  Last weekend, we had an open house at church.  I had made several buntings for one of the kids' activities, and a couple of them made their way back to my home.  One on the mantle-


 And, one to this- perhaps my favorite vignette of the whole house!


This little tree found a very special place in the living room where it can be seen both from the living and dining rooms, and even from the kitchen.  I've had this little artificial tree for years, but it almost found itself in the trash several years back.  It was previously pre-lit, but when the lights partially burned out, I was ready to trash it.  Until Colin pointed out that we could just add lights to it.  So, we did!  Once we strung the new lights and decorated it, you could hardly notice the non-burning lights.  Well, this year, Colin suggested that we remove the dead lights.  Um, have you ever tried to de-light a pre-lit tree? Let's just say those lights are not meant to ever come off!  It took several hours to remove the lights from our little tree, but Colin was right- it's much better.


 I kept things really simple with this tree.  It sits in an urn that I've always found a bit formal, so I plopped it into an old beverage tub and covered it with some burlap and a drop cloth remnant.  The decorations are  very natural- pine cones, several ornaments, and my favorite of all- twine for garland.


As I was snapping these pictures, Piper hopped onto the couch and began looking so incredibly adorable.

 I could not stop myself from taking a couple pictures of her.  I mean, can you blame me?!


xo,

Emily

Wrapping it up

In past years, I have really enjoyed wrapping gifts in lovely, colorful paper.  But, this year- again sticking with this monochromatic, minimalistic-ish theme- I wrapped everything in a very modest brown paper that I found at Home Depot.  It is sold as "Builder's Paper" and set me back only $11 for a roll of 140 feet (which I presume will last me an eternity!).  Paired with brightly color ribbons, it's exactly what I was going for.


 It makes me so happy to see these simple and cheerful packages every time I walk into the family room.  And, actually there's a story behind the ribbons, too.  I got them from Hobby Lobby in a miscellaneous ribbon grab bag.  It was, of course, 50% off, and came to maybe $3.  I have been using them for wrapping, and one might have even made it into my wardrobe once.  :)


xo,

Emily

Wednesday, November 30, 2011

Custom Coasters

Let's make some coasters, shall we?


I found these homemade beverage coasters via pinterest here.  And, here's my take on the project.  In my typical skeptical manner, I wasn't sure that your basic ceramic tile would work that great for a coaster.  I was picturing water piling up and rolling off the tile onto my delicate table and making a water ring.  So, I picked up a preliminary 2 tiles from the home improvement store to test them out.  The tiles were nothin' fancy, since I wasn't even sure this project would be a go.  These puppies set me back 31 cents each.  Ouch.


I used the tiles as-is for several days and determined that yes- they do indeed succeed in keeping water up off the furniture.  I wouldn't say they exactly soak the sweat up, but they keep the furniture dry, and that's all I need.  So, once I determined the coasters were here to stay, I decided to gussy them up a bit.  I picked up 2 pieces of craft paper from HobLob for 44 cents a piece.  Except they were 50% off, so they were really only 22 cents a piece.  I spare no expense. 


Then, I cut the pieces of paper to size.  One sheet of the craft paper would actually be enough to make 9 coasters.  The tile I picked up has kind of slanted edges.  I wasn't sure if I should cut the paper to the exact size of the coaster or leave a border of tile where it starts to drop off, so I did one of each.  Once the paper was cut, I got out the mod podge.  I gave it several layers of mod podgey goodness.


 After the mod podge, I coated it with a couple coats of this stuff. 


I have never used this stuff before, but it says it provides a permanent, water-resistant coating, and that's what I'm after.  The last step was to put little felt feet on the bottom.  I already had these guys on hand from another project, but I think the whole pack of 24 of them was about $3.50.  Some other options are homemade felt circles or cork cut to size.


All in all, I am very happy with the result.  If I do this again, I might look for totally flat tiles.  Not only are mine slanted near the edges, the entire surface is kinda textured, which causes the craft paper to look like it's not lying flat even though it is.  I'm not sure anyone would notice, but still.  Cost wise, this project can't be beat.  I estimate a cost of less than 50 cents per coaster.  I had some of the supplies on hand, but even if you had to purchase the mod podge and the acrylic sealer, we're talking about a 10 buck investment with a lot of leftovers.  I especially like the project because it enabled me to make a totally custom coaster for my bedroom and one for my office/craft room.  Since the color schemes in those two rooms are quite deviant from those of the rest of my house, it just made sense to do something custom rather than having to buy a set of 4 or 8 in a very specific color scheme.


xo,

Emily


Behold the Mighty Drop Cloth

Have I mentioned my love for the Mighty Drop Cloth?

No, not just any drop cloth, but the pre-hemmed, fabric ones you can get from the home improvement stores.  I read about the drop cloth curtain rage that is all over the interwebs several months ago (yes, I am perpetually late on these things), and I immediately knew I needed to try my hand at this.  We have a large picture window in our living room, and I like to have several sets of curtains hung high and wide that I can change out with the seasons my moods.  I've got the light weight, white cotton set from Ikea that we use in the summer months, and the heavier, darker set for winter, but I knew a neutral pair of drop cloth curtains would be juuuust right (said in Goldilocks fashion) for the transitional seasons.

So, I marched right down to my local HD, and picked up 2 6' x 9', pre-hemmed drop cloths for 10 bucks a pop. 


The first thing I noticed was that the drop clothes are actually not 6' x 9'.  They're really only 5'9" x 8'9".   This wasn't an issue for my project, but it's a good thing to know depending on what you're using the drop cloth for.  Secondly, I noticed that the first two I grabbed were very different in color.  Almost like they were from totally different lots.  No biggie- a little digging, and I found two that were pretty similar.

So, once I got these babies home and ran them through a quick wash and dry, it took me about 10 minutes to have them hanging and done.  Remember- my hardware was already hanging, so I determined how long I wanted them, and folded the extra over- unfinished side out- and ironed.  Oddly, the hem and wrong side make a lovely header from which to clip your little ringie things.


 And, that's it, folks.  Your curtains are done-zo!  Stand back and admire your hard work.

I know those pictures aren't the best, but they were pre-painting of the book cases, and even pre-blog, so I was really just taking them for my own records.  Here's a better picture that shows how finished the curtains look in the room.
But, it doesn't stop there, folks.  There are a million other things you can do with your Mighty Drop Cloth!

Behold the drop cloth pillow,


the drop cloth table runner,


 the drop cloth napkin,

and, the drop cloth remnant turned table cloth.


I made all of those from one extra drop cloth.  You never know where a drop cloth will turn up in this house, and at 10 bucks a pop, the price is definitely right!


xo,

Emily

PS.  Um, this blogging thing around Christmas time is HARD.  I am doing tons of crafting and creating, but I cannot blog about it, because it's for gifts.  Gifts for people (the ONLY people) who read my blog.  Haha!  So, I'm doing my best to not drop off the face of the blog world.  Fingers crossed.